.... found in the sixties..
Check out the Dutch Dare blog tomorrow to see my first lo in weeks :-)
Tuesday, June 12, 2007


Tuesday, May 22, 2007
Finding You # 3


Way behind...but getting there :-)
Decided to scan the pages before the journaling was added so you can all enjoy the background I made, and not looking at blurry text.
Inspired by the picture I chose to use for this weeks assignment, I decided to make my own background, not using any patterned papers this week.
First I coloured the background with watercolour paint. Then I added accents / changed the colours a bit by dabbing some Colorbox Cat's Eye ink on it.
Next I stamped on "the water" and "the beach" with Versamark ink and added some Perfect Pearls from Ranger to it to get this cool shiny metal effect.
I used my new Autumn Leaves Big Swirl stamps with silver colour Colorbox ink for the finishing touch.
The lettering on the left page are Autumn Leaves stamps also, and the white outlining of the letters was done with a white UNI POSCA pen.
These pens are a must have; if you wanna know more, then click on the link to see what they can do and to see the available colours
Tuesday, May 15, 2007
Are you ready....
....for a brand new Dutch Dare?
Check out the Dutch Dare blog tomorrow to see what the new challenge is.
Here's a little sneak peek already

Check out the Dutch Dare blog tomorrow to see what the new challenge is.
Here's a little sneak peek already

Sunday, May 13, 2007
Mother's Day - DT kit Memory Lane
 Last month our DT assignment was to make something with the red, cream and black collection from Autumn Leaves with the following theme: Mother.
I altered a 3D photoframe from Ikea; printed an old picture of my mother on an inkjet transparency and adhered it to the cardboard frame on which I glued 4 different pieces of patterned paper. On the background of the 3D frame I glued a big bloomer (check them out HERE) and you can see it through my mother's face.
The final effect is kind of difficult to photograph so I hope you get the point.
Wanna see what the rest of the DT did with this assignment?
Then have a look HERE
Enjoy your sunday :-)
Sunday, May 06, 2007
Finding You #2
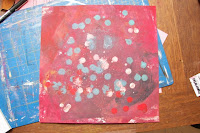
 I stamped the background with bubble wrap; the effect is really cool I think :-).
My goal for this workshop is to refind my discipline..... I used to be EXTREMELY disciplined, but somewhere along the way I lost it.
 It has nothing to do with my job or anything...I just need more discipline to achieve some things I think will make my life better.... but first I need that discipline back!
Thursday, May 03, 2007


Tuesday, May 01, 2007

Monday, April 30, 2007
Break
Studio DaphNat is taking a little break :-)
Nat is on vacation and when she comes back, I will go on a little holiday myself!
Nat is on vacation and when she comes back, I will go on a little holiday myself!
Sunday, April 22, 2007
Studio DaphNat #6 - Layered Masking Tape Technique
 We just can't get enough of Claudine Hellmuth's books; this time we tried another one of her techniques. And again it is simple to do, you do not need a lot of supplies and the results just rule!!
 What you need this week:
Masking Tape
Acrylic Paint (1 or 2 or 3 colours; experiment!)
Gel Medium
How to do it:
Tear different sizes of masking tape and stick them on a piece of cardstock. Just keep layering pieces of tape on top of eachother until you like the structure of it.
 The next step is to seal the masking tape with a layer of gel medium
Let it dry by air or use a heattool.
To finish your project add a layer of (thinned) paint and dabb it off with a paper napkin. Add a second layer of paint (this can be a different colour like I did here)and also dab it.
I used an oily baby wipe on the second layer of paint.
Since this is such an easy to do technique don't be afraid to experiment with multiple colours, adding paint with your fingers, use really thin paint...you name it! Just try it!
Have fun and don't forget to stop by at Nat's blog to see what she did with this technique :-)
Monday, April 16, 2007
Finding You # 1


I decided to make all the layouts for the Finding You workshop on a size I had never worked on before: 6 x 12 inch.
I make the layouts on kraft cardstock first and then glue them to cardboard.
Although I am posting a bit late...I am right on schedule with the workshop :)
The rest will be posted in a while so stay tuned
Sunday, April 15, 2007
Studio DaphNat #4 - THE RESULTS - Plastic Wrap Crinkle
 I have been a bit lazy posting lately...but I still managed to find some time to create something with the result of the Plastic Wrap Crinkle technique Nat and I tried a while ago. To make the following project I actually sanded most of the crinkle wrap look away LOL.
Then I made some gel medium transfers of typical Mexican skull images to the sides of the box.
I also made a gel medium transfer of Frida on a piece of linocut.
I used a lot of flowers because on most pictures Frida is wearing a lot of flowers in her hair, in bright colours. To buy these flowers check out the Memory Lane Website.
The little square buttons on the flowers are also for sale @ Memory Lane. As well as the big MDF letter "F".
I painted this letter using a technique Nat and I tried earlier; the Peeling Paint technique.
To finish it I stamped on it with one of the new stamps I got from this really cool stampshop Stamp Francisco
Paper on the background is from Basic Grey and I stamped on the glass with Stazon and Autumn Leaves Alpha stamps ( which I love love love!)
Check out Nat's blog: She has made a beautiful canvas!!


Monday, April 09, 2007
Studio DaphNat #5 - Crayon Muffin Technique
The previous posts from Studio DaphNat were about techniques taken from Claudine Hellmuts books.
This week we wanted to try something different and we chose a technique from "Collage Unleashed" by Traci Bautista.
Nat baptized this technique "Crayon Muffin"; you will understand this later on.
What you need this week:
Crayons (the cheap ones for children work perfectly)
Travel Iron (or iron without holes!)
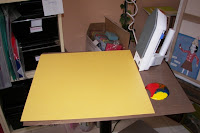
Cardstock
Disposable muffin tin
Heat gun
Items with texture that you can use for stamping
Glitter
Craft Sheet
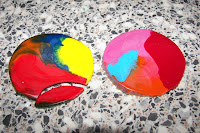
Step 1 - transform crayons into a crayon cupcake / crayon muffin :)
How to do it?
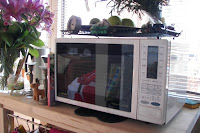
Preheat your oven at more or less 120 degrees Celsius (250 Fahrenheit)
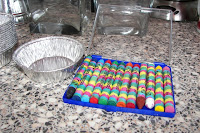
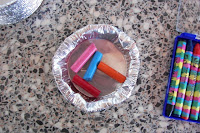
Break pieces of crayons (remove the paper!) and layer them into the disposable muffin tin.
Put this in the oven and wait to see when the crayons start melting.
When they are melted, turn off the oven and let the crayons dry completely.
DO NOT MOVE the muffin tin; the colours will mix too much.
Step 2 - transform blank cardstock in a cool waxed background paper
Although in the book it said to smear the cupcake directly on a heated travel iron.... I decided to try it in a different way after my floor was full of dripped crayon :(.
I just lay the cupcake on my craft sheet and pressed my travel iron on it.
This way you can apply the wax easily to the cardstock.
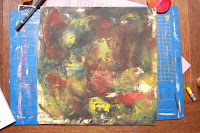
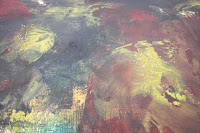
Keep on adding the wax, turning and twisting your iron onto the cardstock, until the background is as you like it.
Step 3 - Adding texture / drizzle / glitter / doodling
Now that you have your background finished you can do whatever you like.
While the wax is still hot...you can doodle on it, add glitter, add texture with textured wallpaper for instance...
What I did was draw on the hot iron with a crayon and then drizzle this onto the cardstock.
Just be creative and make your own waxed background paper :)
All in all...this technique is easy and difficult at the same time... adding melted wax to cardstock with an iron isn't that difficult.
What does make it not an easy to do technique is that you have to know when to stop...you have to mix the right colours... etc etc.
So this one takes some practice..but still is fun to do!!
Now check out Nat's results on her blog!
.JPG)
.JPG)
.JPG)
.JPG)
.JPG)
.JPG)
.JPG)
.JPG)
This week we wanted to try something different and we chose a technique from "Collage Unleashed" by Traci Bautista.
Nat baptized this technique "Crayon Muffin"; you will understand this later on.
What you need this week:
Crayons (the cheap ones for children work perfectly)
Travel Iron (or iron without holes!)
Cardstock
Disposable muffin tin
Heat gun
Items with texture that you can use for stamping
Glitter
Craft Sheet
Step 1 - transform crayons into a crayon cupcake / crayon muffin :)
How to do it?
Preheat your oven at more or less 120 degrees Celsius (250 Fahrenheit)
Break pieces of crayons (remove the paper!) and layer them into the disposable muffin tin.
Put this in the oven and wait to see when the crayons start melting.
When they are melted, turn off the oven and let the crayons dry completely.
DO NOT MOVE the muffin tin; the colours will mix too much.
Step 2 - transform blank cardstock in a cool waxed background paper
Although in the book it said to smear the cupcake directly on a heated travel iron.... I decided to try it in a different way after my floor was full of dripped crayon :(.
I just lay the cupcake on my craft sheet and pressed my travel iron on it.
This way you can apply the wax easily to the cardstock.
Keep on adding the wax, turning and twisting your iron onto the cardstock, until the background is as you like it.
Step 3 - Adding texture / drizzle / glitter / doodling
Now that you have your background finished you can do whatever you like.
While the wax is still hot...you can doodle on it, add glitter, add texture with textured wallpaper for instance...
What I did was draw on the hot iron with a crayon and then drizzle this onto the cardstock.
Just be creative and make your own waxed background paper :)
All in all...this technique is easy and difficult at the same time... adding melted wax to cardstock with an iron isn't that difficult.
What does make it not an easy to do technique is that you have to know when to stop...you have to mix the right colours... etc etc.
So this one takes some practice..but still is fun to do!!
Now check out Nat's results on her blog!

.JPG)
.JPG)
.JPG)
.JPG)
.JPG)
.JPG)
.JPG)
.JPG)
Wednesday, April 04, 2007
A new day... A new dare
Check out the Dutch Dare blog.......NOW!
We have a guest designer this week :)
We have a guest designer this week :)
Monday, April 02, 2007
Studio DaphNat #3 - THE RESULTS - Peeling Paint Technique

For the results of the peeling paint technique that Nat and I tried 3 weeks ago I let myself be inspired by spring and made a
BIRD IN A BOX


Supplies used:
Outside of the box:
Ikea wooden box small
Acrylic Paint
Vaseline
Inside of the box:
Basic Grey patterned paper
Bird in nest with eggs from Xenos
Photo on the background printed on transparency inkjet paper
Golden gel medium to glue everything
pieces of a tree
and some green Christmas decoration stuff from Praxis.
Don't forget to check out Nat's blog to see her amazing creation for this technique!
Next Sunday we will post a new technique for Studio DaphNat!
Monday, March 26, 2007
Deck of Me # 10 & # 11
 The prompt for # 10 was: "A note to self"....mine is quite long..... Luckily it is only a small card or the note would be a lot longer
 The prompt for card #11 was "your initial". At first I was making a list of words beginning with a D;
 doomed
death
dramatic
drastic
dumm
But then I decided to choose a somewhat more positive direction and ripped out the word "dream" of the dictionary and glued it to the back, stamping my name all over it.
Sunday, March 25, 2007
Studio DaphNat # 4 - Plastic Wrap Crinkle
+aangepast.JPG)
+aangepast.JPG)
+aangepast.JPG)
A new technique from Studio DaphNat and it is an easy one this time!
Supplies:
Plastic Wrap (vershoudfolie in dutch)
Acrylic Paint (1 or 2 colours)
Mix your acrylic paint with so much water that it gets the consistency of watercolour.
Start painting your surface (you can choose to use 2 colours next to eachother) and when you are done carefully place the plastic wrap over it.
TIP: Already cut a piece of plastic wrap quite a bit bigger than your
surface before you start painting; you don't want to have to hurry at the
time that you actually need it.
Leave the plastic wrap on your surface and carefully start moving it around with your fingers until it looks crinkled enough to you.
Wait until the paint is completely dry and then carefully remove the plastic wrap:
TAADAAAAA!!!
An easy technique with great results!
This cool background technique can be found in "Collage Discovery Workshop: Beyond the Unexpected" from Claudine Hellmuth
+aangepast.JPG) First layer: Gold Acrylic Paint
First layer: Gold Acrylic PaintSecond layer: Red Acrylic Paint
Surface: Wood
+aangepast.JPG) First layer: 2 different green colours acrylic paint
First layer: 2 different green colours acrylic paintSurface: Acrylic canvas paper
(bad photo....with flash)
+aangepast.JPG) First layer: White Acrylic Paint
First layer: White Acrylic PaintSurface: Black Bazzill cardstock
Now hurry over to Nat's Blog :); she says it is her favorite technique so far!
And enjoy playing with this technique yourself :)!
Tuesday, March 20, 2007
Sneak Peek Dutch Dare # 10
 Quite a big sneak this time :).
Have a look at the picture and take your time to read this little piece of Dutch history before you go over to the Dutch Dare blog to see the new dare, which will be posted on Wednesday morning.
BTW....the girl on the picture....
is my mother in law.
Sunday, March 18, 2007
Studio DaphNat #2 - THE RESULTS - Rinse Aid Resist
A few weeks ago Nat and I tried the Rinse Aid Resist technique.
I tried it on a canvas. Because I wasn't really satisfied with the results I tried the Peeling Paint technique last weekend to make the canvas look better; a good decision.. I loved the canvas after that.
This weekend we both worked on a project for our Rinse Aid experiment and I am really proud to show it here.
It took me 7! hours to make it look like this but I LOVE the result.
First I made 2 phototransfers (color & black/white) on the canvas with Golden gel medium... I did something wrong but I liked the result anyhow...Might have to explore this technique further together with Nat later on..


Because the transfer directly on canvas didn't work out the way I planned I made a transfer with the color copy and contactpaper. I started adding and moving around paper, fibers, paint, did some stamping on the canvas with Stazon and after a while this is what came out of it:


Now go over to Nat's blog and check out her Rinse Aid Results!
I tried it on a canvas. Because I wasn't really satisfied with the results I tried the Peeling Paint technique last weekend to make the canvas look better; a good decision.. I loved the canvas after that.
This weekend we both worked on a project for our Rinse Aid experiment and I am really proud to show it here.
It took me 7! hours to make it look like this but I LOVE the result.
First I made 2 phototransfers (color & black/white) on the canvas with Golden gel medium... I did something wrong but I liked the result anyhow...Might have to explore this technique further together with Nat later on..


Because the transfer directly on canvas didn't work out the way I planned I made a transfer with the color copy and contactpaper. I started adding and moving around paper, fibers, paint, did some stamping on the canvas with Stazon and after a while this is what came out of it:


Now go over to Nat's blog and check out her Rinse Aid Results!
Friday, March 16, 2007
Journalers Junction #10 - Inspired by a song

If you don't know the song; take your time to listen... it is sooooo beautiful.
I am not really a big John Lennon fan but this is just perfect!
Monday, March 12, 2007
Studio DaphNat #3 - Peeling Paint Technique
 2 weeks already have passed since
Nat and I tried the Rinse Aid Resist Technique
as described on page 30 from Claudine Hellmuths book "Collage Discovery Workshop: Beyond the Unexpected".
We were both not really satisfied with the results from our experiments with the rinse aid so this week we decided to try a new technique from Claudine Hellmuth, with which you can achieve similar results:
PEELING PAINT TECHNIQUE
WHAT YOU NEED is the following:
Petroleum Jelly
Acrylic Paints
Water
Brushes
Fingers
Baby Wipes
Tissues
Gel Medium (optional)
You can choose your own art surface.
I chose to try this technique on 3 different surfaces:
canvas
wood
paper
HOW TO DO IT?
Add a medium thick layer of petroleum jelly to your art surface
Paint a thinned layer (not too thin) of acrylic paint over it.
The petroleum jelly will work as a resist.
When the layer of paint is dry, you can use tissues or baby wipes (worked the best for me) to wipe of the remaining petroleum jelly.
The following pictures show the process step by step:

.JPG)
.JPG)
.JPG)
.JPG)
+copy.jpg)
Since I was not really happy with my rinse aid results on the canvas I thought I'd try to use the peeling paint technique to make the canvas look a little bit better; the results show in the picture in the beginning of this post.
To finish the experiment I also tried the peeling paint technique on paper.
In order to not damage your paper you have to cover it with gel medium first.
When this layer is dry you can start adding the petroleum jelly to the parts that you want to leave open.

.JPG)
.JPG)
.JPG)
All in all this is a very simple to do technique and you do not need a lot of time, since acrylic paints dry very fast and so does the gel medium.
Try it out yourself and when you do leave me and Nat a message so that we can see your results. I would be really interested seeing some furniture altered with this technique.......
Have fun and don't forget to check out Nat's results on her blog!
Subscribe to:
Posts (Atom)