Monday, August 20, 2007
Studio Daphnat # 7 - RESULTS
The technique itself is very fun and easy to do....but when it comes to making something with your selfmade woven chipboard background...the problems begin...
So....I decided to make a background for my chipboard "carpet" because I loved it so much in itself, I wanted it to be to focus of my project.
I made a background with Ecoline in 3 colours (including gold) and I used coarse seasalt to get this effect.
Then I stamped with different stamps and Stazon colours on my chipboard strips and inked some of the edges with Cat's Eye ink, to make them stand out more.
What else did I use?
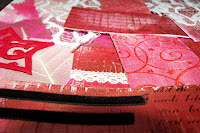
A fabric sample from a Chinese manufacturer I took home from my work, black velvet ribbon, 7 Gypsies red letter tape, Basic Grey Wholy Cow rub-ons, skeleton leaves, a piece of pink lace from my wedding bouquet, white ribbon.....
As a finishing touch I added some Gold Mica Flakes from Golden Paints on 3 places. I might add some of these flakes later on to the outside of the frame.
I am very pleased with the result! Go check out Nat's website to see what she made.
Saturday, August 18, 2007
Dutch Dare #19.....
.... better late than never.
I am a little behind on all the dares as you may have noticed...but I'm getting there :-).
This layout shows me at 16 with a typical hairdo of the time.
I used the latest series from Basic Grey "Infuse".
Another series of papers that you must have if you are a real BG-lover!
Wanna have a laugh? Then check out the Dutch Dare blog and scroll down to see Dutch Dare 19.... and enjoy all the hairdo's of the rest of DT girls. that is..if you haven't seen them already.
Stay tuned for Dutch Dare 20 (it is already online on the dare blog of course)and the results of last weeks Studio DaphNat
Sunday, August 05, 2007
Studio Daphnat # 7 - Chipboard Weaving Technique
It has been a while...since the last Studio DaphNat technique. Of course all this time that I was lying on the couch I had enough time to think of new technique Nat and I could try.
Going through all my scrap-books (I mean books about scrapbooking and creative techniques :-)..).
In a book set from Creating Keepsakes I found this chipboard weaving technique which looked really cool.
What you need for this technique:
- Chipboard
- Gesso
- Paint
- Items to make a structure in the wet gesso.
What to do:
Cut strips of chipboard in desired size, so you can weave them later on, when you are done painting etc.
Add a medium thick layer of gesso to your strips of chipboard and before it dries, make a structure in it with whatever item you choose. This can be a stamp or the back of a pencil or anything you can use to structure the still wet gesso.
If you are using a stamp, clean it immediately with water!! Don't wait or your stamp will be ruined for eternity!
Wait for the gesso to dry and then add paint to your chipboard design, rubbing it in with a babywipe (gives cool effects because of the oil) or a paper napkin.
When the paintlayer is dry you can start weaving!
I was really surprised at how quick you can make a fantastic background like this.
You should definitely try this done!
Now check out Nat's design! Have fun!
Saturday, August 04, 2007
MLS challenge july
This is just 1 of a set of cards we had to make for the Memory Lane DT challenge in July, using the "Perfectly Posh" series from Tinkering Ink & Autumn Leaves clearstamps.
Want to see more? Check out the special gallery for the DT challenges HERE.
If you have been wanting to buy Autumn Leaves stamps, NOW is the time: they are on sale on the Memory Lane website; the whole month of August you get 25% discount :-)!!
Want to see more? Check out the special gallery for the DT challenges HERE.
If you have been wanting to buy Autumn Leaves stamps, NOW is the time: they are on sale on the Memory Lane website; the whole month of August you get 25% discount :-)!!
Subscribe to:
Posts (Atom)