The previous posts from Studio DaphNat were about techniques taken from
Claudine Hellmuts books.
This week we wanted to try something different and we chose a technique from "Collage Unleashed" by
Traci Bautista.
Nat baptized this technique "Crayon Muffin"; you will understand this later on.
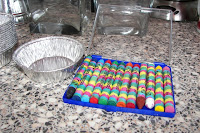
What you need this week:
Crayons (the cheap ones for children work perfectly)
Travel Iron (or iron without holes!)
Cardstock
Disposable muffin tin
Heat gun
Items with texture that you can use for stamping
Glitter
Craft Sheet
Step 1 - transform crayons into a crayon cupcake / crayon muffin :)How to do it?
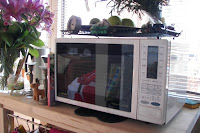
Preheat your oven at more or less 120 degrees Celsius (250 Fahrenheit)
Break pieces of crayons (remove the paper!) and layer them into the disposable muffin tin.
Put this in the oven and wait to see when the crayons start melting.
When they are melted, turn off the oven and let the crayons dry completely.
DO NOT MOVE the muffin tin; the colours will mix too much.
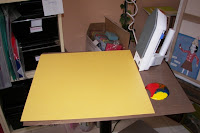
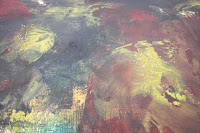
Step 2 - transform blank cardstock in a cool waxed background paperAlthough in the book it said to smear the cupcake directly on a heated travel iron.... I decided to try it in a different way after my floor was full of dripped crayon :(.
I just lay the cupcake on my craft sheet and pressed my travel iron on it.
This way you can apply the wax easily to the cardstock.
Keep on adding the wax, turning and twisting your iron onto the cardstock, until the background is as you like it.
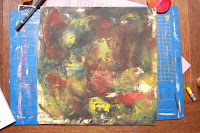
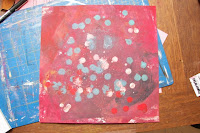
Step 3 - Adding texture / drizzle / glitter / doodling
Now that you have your background finished you can do whatever you like.
While the wax is still hot...you can doodle on it, add glitter, add texture with textured wallpaper for instance...
What I did was draw on the hot iron with a crayon and then drizzle this onto the cardstock.
Just be creative and make your own waxed background paper :)
All in all...this technique is easy and difficult at the same time... adding melted wax to cardstock with an iron isn't that difficult.
What does make it not an easy to do technique is that you have to know when to stop...you have to mix the right colours... etc etc.
So this one takes some practice..but still is fun to do!!
Now check out
Nat's results on her blog!
.JPG)
.JPG)
.JPG)
.JPG)
.JPG)
.JPG)
.JPG)
.JPG)


.JPG)
.JPG)
.JPG)
.JPG)
.JPG)
.JPG)
.JPG)
.JPG)


